Here is the inspiration:
 |
 |
| My version |
And the process for getting from one to the other:
The only thing that I had to purchase was the burlap from JoAnn Fabrics. I bought the cheapest burlap, plus it was Veteran's Day so I got even more money off with a military discount. I bought 3 yards for $7.00 (yes, I will be making a lot more of these banners). I already had paint, a paintbrush, and yarn from an earlier DIY project. I also used my Cricut (an amazing crafty gift from Matt a couple of birthdays ago) to make the stenciled letters. If you don't have a Cricut, these stencils can be purchased cheaply at Michael's, along with the paint, paintbrush, and yarn.
Step 1:
 |
| I eyeballed the size triangle I wanted to make for my first flag. I used this as a template for the rest. |
Step 2:
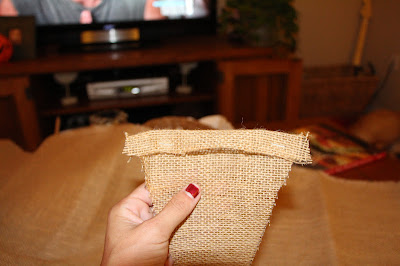
 |
| I stapled about a 1-inch flap for the yarn. You are supposed to sew this, but since I can't sew I came up with an alternative. |
Step 3:
 |
| I strung all of the flags together. I found it easier to do this before painting. Before or after would work. |
Step 4:
 |
| I used my beloved Cricut to make the stencils out of cardstock scrap paper . |
Step 5:
 |
| All the stencils. |
Step 6:
 |
| It is important that the stencils lay flat against the fabric so that the paint doesn't bleed . There were many suggestions on how to do this. I used Matt; he is a keeper. |
Step 7:
 |
| Paint over the stencil. |
Step 8:
 |
| Here is the result when you remove the stencil. |
Step 9:
 |
| Allow time to dry. I'm not sure why this picture is loading like this, but you get the point. |
 |
| Hang and enjoy! |


No comments:
Post a Comment